Quick Dimension
Read sizes on screen, or generate an A3 drawing from your selection.
Baca ukuran di layar, atau buat gambar A3 dari objek yang dipilih.
1. Install1. Instalasi
- Download the
.rbzfrom the main page. - SketchUp: Extensions › Extension Manager › Install Extension… and choose the file.
- Find it under Extensions › Quick Dimension, or show the toolbar in View › Toolbars.
- Unduh
.rbzdari halaman utama. - Di SketchUp: Extensions › Extension Manager › Install Extension… lalu pilih filenya.
- Buka lewat Extensions › Quick Dimension, atau tampilkan toolbar di View › Toolbars.
2. Live dimensions2. Dimensi langsung
Measure on screen without adding anything to the model.
Ukur di layar tanpa menambah apa pun ke model.
- Choose a mode from the toolbar: Overall, Object / Face or All.
- Click an object. Its dimensions appear on screen.
- In Object / Face mode, Option-click (Mac) or Ctrl-click (Windows) a face to measure just that face.
- Press Esc to clear the measurement. You stay in the tool, ready to measure again.
- Press Space to leave the tool and go back to Select.
- Pilih mode di toolbar: Overall, Object / Face, atau All.
- Klik objek. Ukurannya muncul di layar.
- Di mode Object / Face, Option-klik (Mac) atau Ctrl-klik (Windows) pada face untuk mengukur face itu saja.
- Tekan Esc untuk menghapus ukuran. Anda tetap di tool dan bisa langsung mengukur lagi.
- Tekan Spasi untuk keluar dari tool dan kembali ke Select.
Object / Face mode fades the rest of the model so the measured object stands out. Change this under Extensions › Quick Dimension › Object / Face: Other Objects.
Mode Object / Face memudarkan bagian lain agar objek yang diukur terlihat jelas. Ubah di Extensions › Quick Dimension › Object / Face: Other Objects.
3. Generate A3 Sheet3. Generate A3 Sheet
- Select the object you want to draw. Stay at the top level of the model, not inside an open group.
- Choose Extensions › Quick Dimension › Generate A3 Sheet, or click its toolbar button.
- If several objects are selected, choose One drawing per object or All as one drawing.
- Choose a folder.
- Wait a few seconds. A window called "QD temporary" opens and closes by itself. Then the folder opens with your files.
- Pilih objek yang ingin digambar. Tetap di level teratas model, bukan di dalam grup yang terbuka.
- Pilih Extensions › Quick Dimension › Generate A3 Sheet, atau klik tombolnya di toolbar.
- Jika beberapa objek dipilih, pilih One drawing per object atau All as one drawing.
- Pilih folder.
- Tunggu beberapa detik. Jendela bernama "QD temporary" terbuka lalu tertutup sendiri. Setelah itu folder terbuka berisi file Anda.
You get a .pdf ready to print and a .layout file you can edit. If nothing is selected, a message asks you to select something first.
Anda mendapat .pdf siap cetak dan file .layout yang bisa diedit. Jika tidak ada yang dipilih, muncul pesan yang meminta Anda memilih objek.
Generate A3 Sheet currently runs on macOS only.
Generate A3 Sheet saat ini hanya berjalan di macOS.
4. What is on the sheet4. Isi lembar
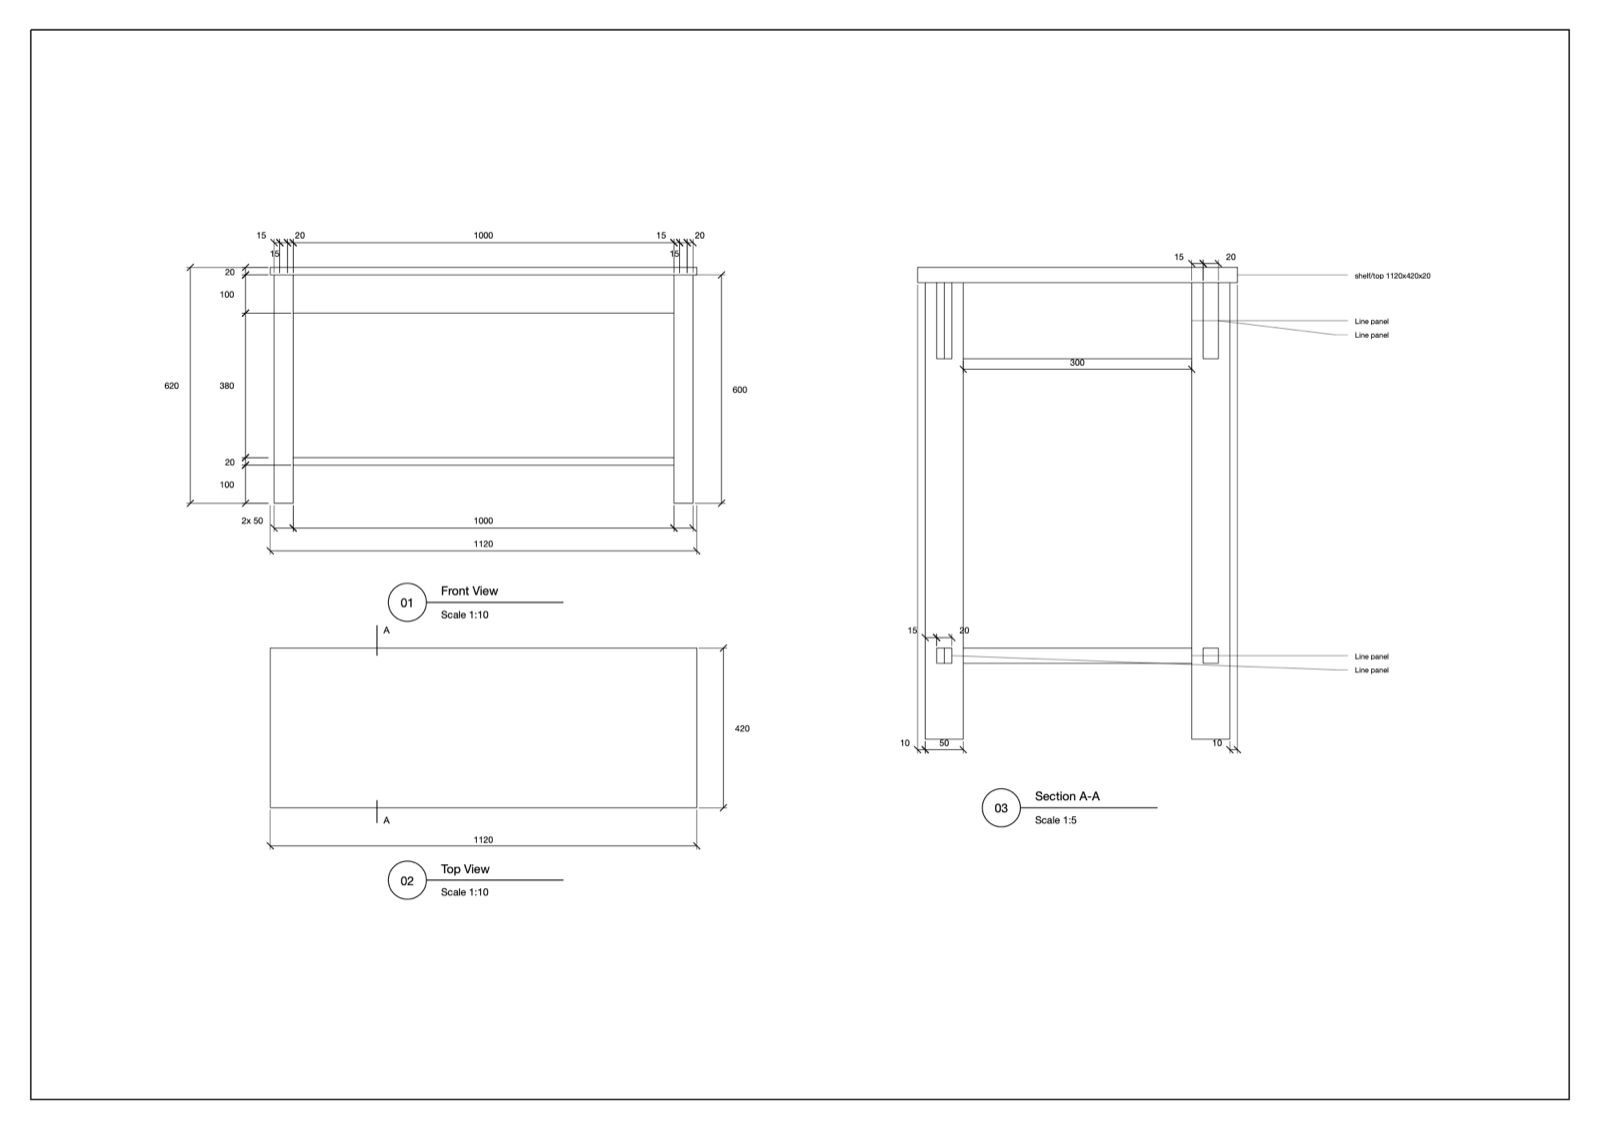
- Page 1: front view, top view and Section A-A, each with its scale. The A marks on the top view show where the section cuts.
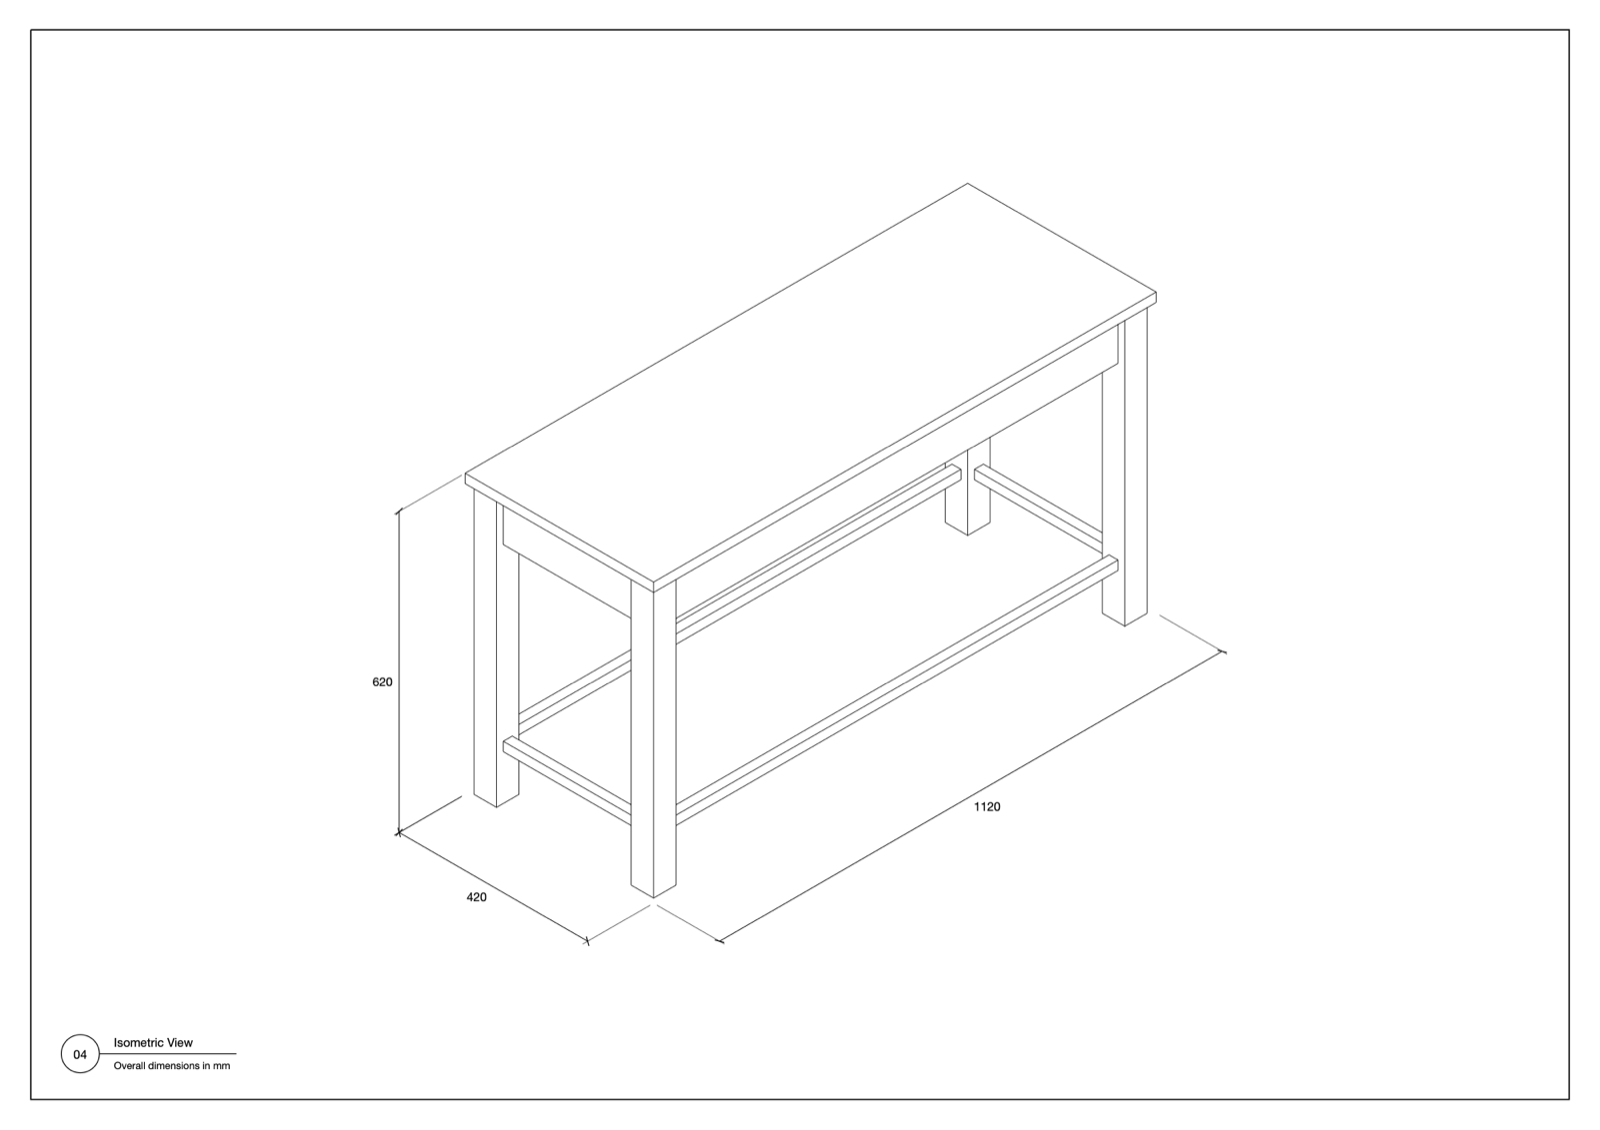
- Page 2: a large isometric with overall width, depth and height.
- Chains: height zones on the left and widths along the bottom, with overall sizes on the outside.
- Section: depths sit beside each part, and part labels are on the right.
- Repeats: parts in an even row get one label, such as
3x 620. - Left undimensioned: parts under 25 mm, and products such as cans.
- Halaman 1: tampak depan, tampak atas, dan Potongan A-A, masing-masing dengan skalanya. Tanda A di tampak atas menunjukkan posisi potongan.
- Halaman 2: isometrik besar dengan lebar, kedalaman, dan tinggi keseluruhan.
- Rantai dimensi: zona tinggi di kiri dan lebar di bawah, dengan ukuran keseluruhan di bagian luar.
- Potongan: kedalaman berada di samping tiap bagian, dan label bagian di sebelah kanan.
- Pengulangan: bagian dalam deretan rata cukup satu label, misalnya
3x 620. - Tanpa dimensi: bagian di bawah 25 mm, dan produk seperti kaleng.
5. Long booths and angled objects5. Booth panjang dan objek miring
- Long booths: a unit much wider than it is tall gets a wide layout, with the front across the sheet and overall sizes and main widths only. For full detail, select the modules and choose One drawing per object.
- Objects at an angle: one selected object sitting at an angle is measured along its own axes, so the front is a true elevation.
- Units along the green axis: they are turned so the long side faces the front. Check that it shows the side you expect.
- Hidden tags: objects on a hidden tag are ignored, so switch on the tags you want first.
- Booth panjang: unit yang jauh lebih lebar daripada tingginya memakai tata letak lebar, dengan tampak depan selebar lembar dan hanya ukuran keseluruhan serta lebar utama. Untuk detail lengkap, pilih modul lalu pilih One drawing per object.
- Objek miring: satu objek terpilih yang posisinya miring diukur mengikuti sumbunya sendiri, sehingga tampak depannya benar.
- Unit searah sumbu hijau: diputar agar sisi panjang menghadap depan. Periksa apakah sisi yang tampil sudah sesuai.
- Tag tersembunyi: objek pada tag tersembunyi diabaikan, jadi nyalakan dulu tag yang diinginkan.
6. Uninstall6. Uninstall
Extensions › Extension Manager › select Quick Dimension › Uninstall.
Extensions › Extension Manager › pilih Quick Dimension › Uninstall.
Buy me a coffee for IDR 10,000. That's less than a dollar. The plugin is free. The coffee is optional. My wife insisted on this button.